Introduction to Food Microbiology and Safety
Standard Plate Count: A Beginner's Guide to Measuring Bacteria in Food Microbiology
In this article, we're taking you on a delightful dive into the world of food microbiology, specifically geared towards those just starting out. We won't be diving into the nitty-gritty of a full-blown experimental manual here. Instead, think of this as your friendly illustrated guide to understanding how bacteria are measured using the "standard plate count" method.
Measuring Method
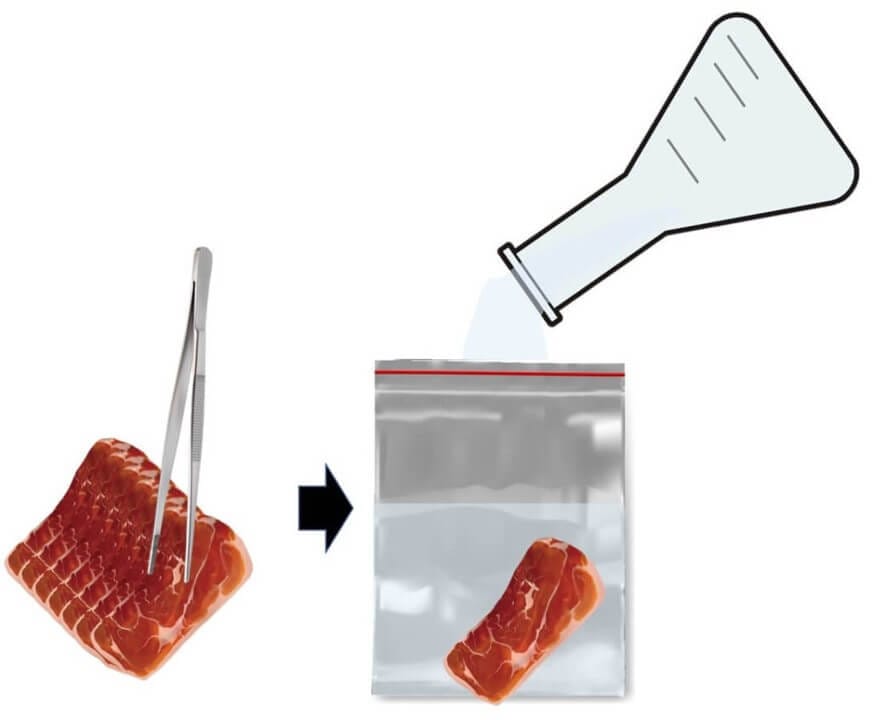
To kick things off in our bacteria counting adventure, grab 25 grams of your food sample and place it into a sterile stomacher bag.
Next, we’re going to be a bit splashy and add nine times the volume of the sample—that's 225ml of dilution water—right into the bag. As for the dilution water, we can be a bit choosy. You can use physiological saline, phosphate buffer saline, or peptone water. The ISO crew recommends peptone water, but depending on where you are, certain laws might dictate the specific type of saline to use.
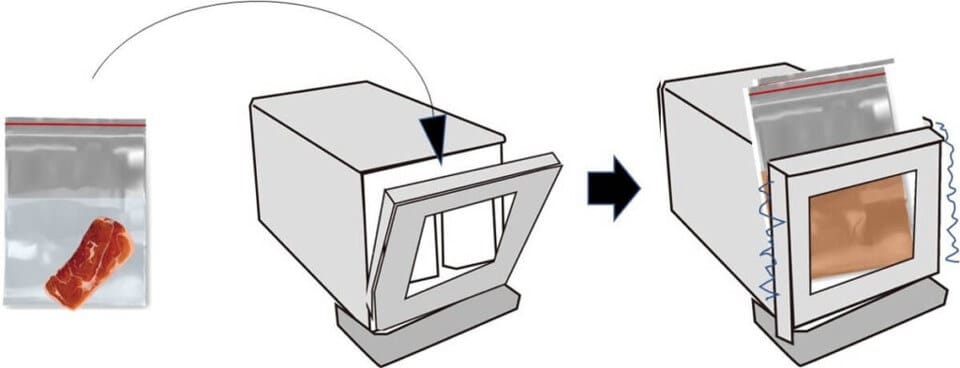
Mixing your food sample with the dilution water is an art form in itself, but the most popular tool for this is the stomacher. This gadget shakes things up quite literally by vigorously pedalling to ensure the food sample and dilution water are thoroughly mixed.
Now, take a daring 1ml of this stomacher liquid and add it to a test tube that already contains 9ml of dilution water. Repeat this dilution step by step until you've adjusted the dilution level of each sample.
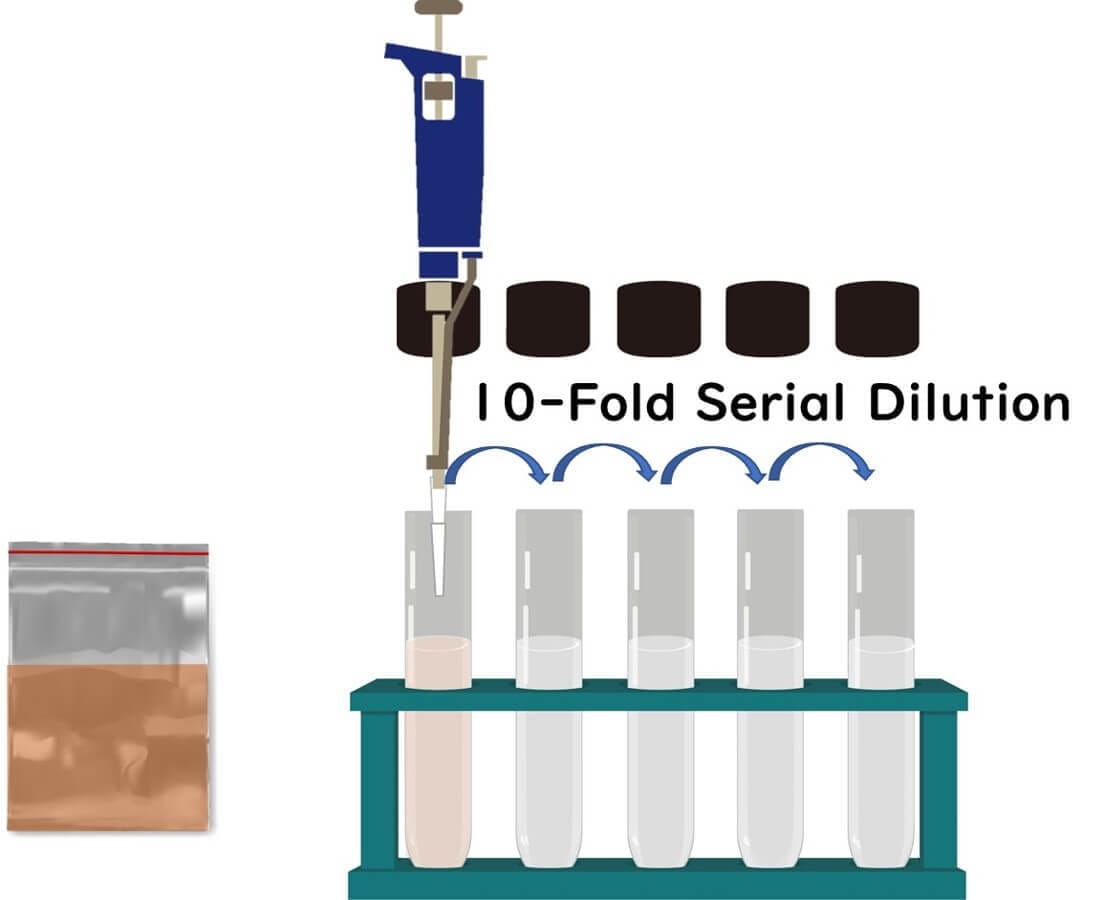
Carefully dispense 1ml of each dilution level into two petri dishes.
Into each dish, pour 15ml of standard agar medium, previously autoclaved and kept warm at 50°C to prevent the agar from setting too soon.
Why do we mix like this in the petri dishes? That’s why it's called the plate dilution method. Not mentioned here but also worth a nod is the spread plate method, where you drop the sample liquid onto solidified agar and then spread it using a glass rod known as a "L-shaped spreader."
The standard agar medium used here is commercially available and is a delightful mix that includes peptone and yeast extract—perfect for growing most microbes. After pouring, gently agitate the dish to mix the sample and agar medium well.
Composition of Standard Agar Medium
Peptone: 5.0 g — The main course for our microbial friends, offering plenty of protein.
Yeast Extract: 2.5 g — Like a vitamin supplement, this provides a mix of essential nutrients.
Glucose: 1.0 g — Just a dash of sugar to keep the energy up.
Agar: 15.0 g — This isn’t your pudding’s gelatin; it’s what keeps everything in place.
Purified Water: 1,000 ml — The base of our culinary concoction.
pH 7.0–7.2 — Perfectly balanced, as all things should be, ensuring the medium is neither too acidic nor too alkaline.

Once the agar in the dishes solidifies, it's time to incubate them. Standard practice in the U.S. and Japan sets the incubation temperature at 35°C, though the ISO prefers a cooler 30°C.
As the agar does its magic, the microbes start to divide. Since they are embedded in the agar, they can't drift away and thus begin forming colonies right where they are. These colonies grow until they’re visible to the naked eye.
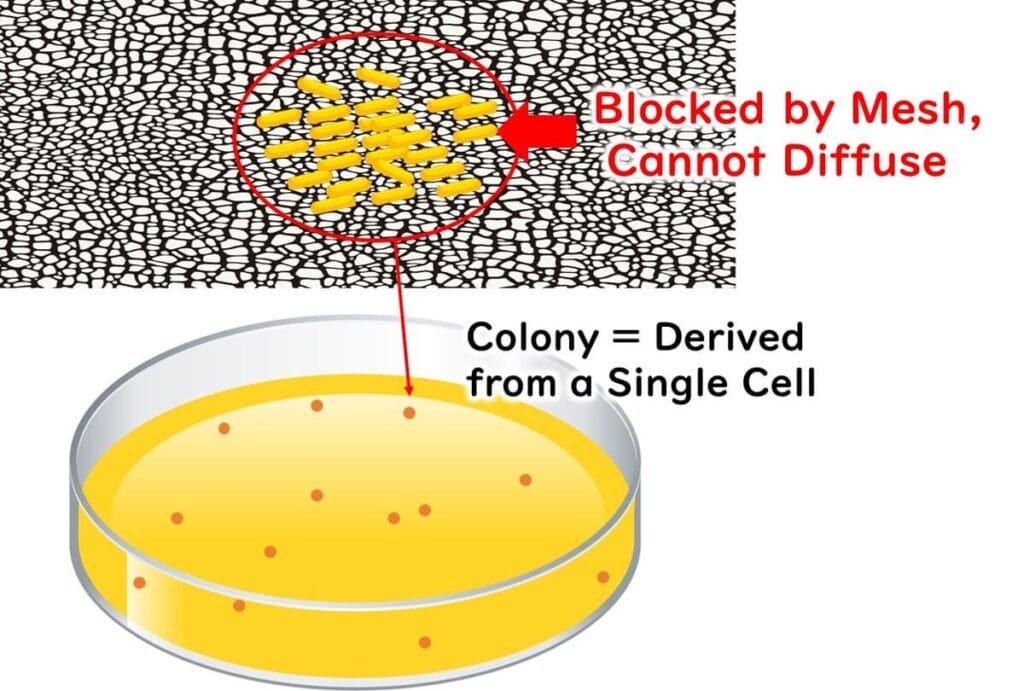
To figure out the original number of live bacteria in your sample, count the colonies that are just right—not too many, not too few—in a dish. Typically, you’ll pick a plate showing 30 to 300 colonies for the most reliable count.
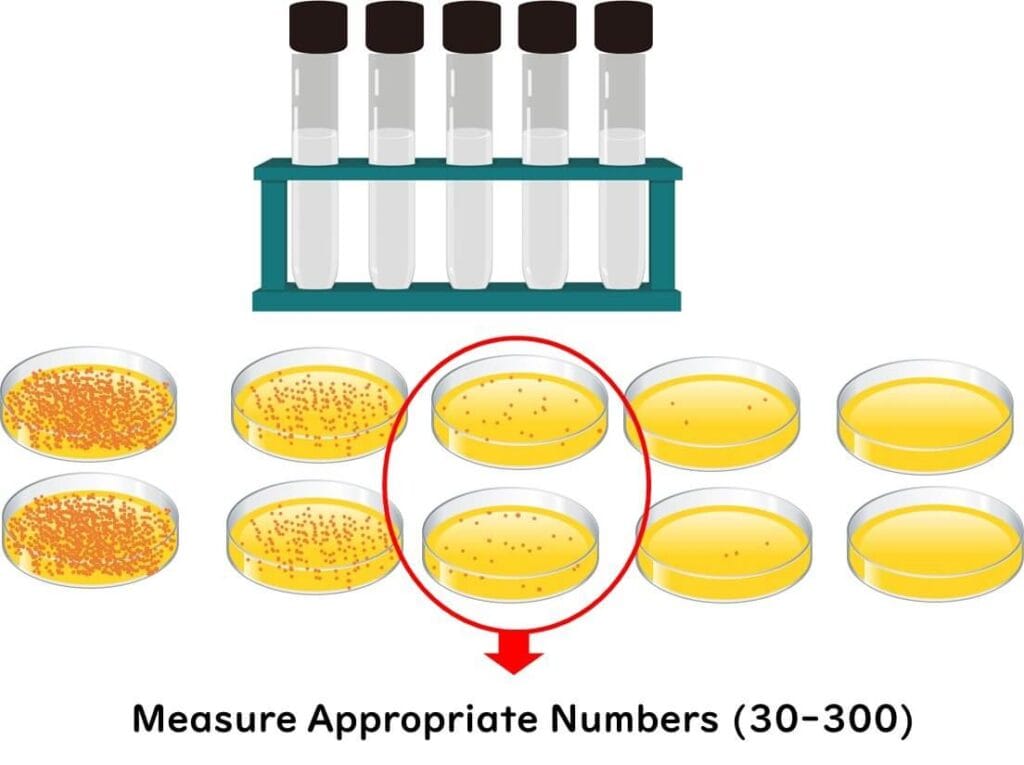
Why Are These Dilution Steps Ideal?
When There Are Too Many Colonies
Picture this: a petri dish that's more crowded than a rush-hour Tube! If there are too many colonies, they might merge into one another, leading you to count two colonies as one—oops! Furthermore, if microbial cells are too cozy (read: too close to each other), one colony could hinder the growth of its neighbour. This neighborly squabble can skew the actual count of viable microbial cells.
When There Are Too Few Colonies
On the flip side, if there are too few colonies, even a slight difference in the number can throw your results into a tizzy, jeopardizing the stability of your data. It's like trying to predict the weather in London with yesterday’s sun; it's just not reliable.
The Goldilocks Zone of Dilution
In the grand scheme of microbial standards, there are specific protocols on how to calculate the total viable count from the number of colonies at each dilution stage. Diving into complex formulas might just boggle the mind of a newbie, so let's keep it simple here. For a scientifically sound and generally accurate measurement, aiming for a dilution stage that results in around 100 colonies is a safe bet.
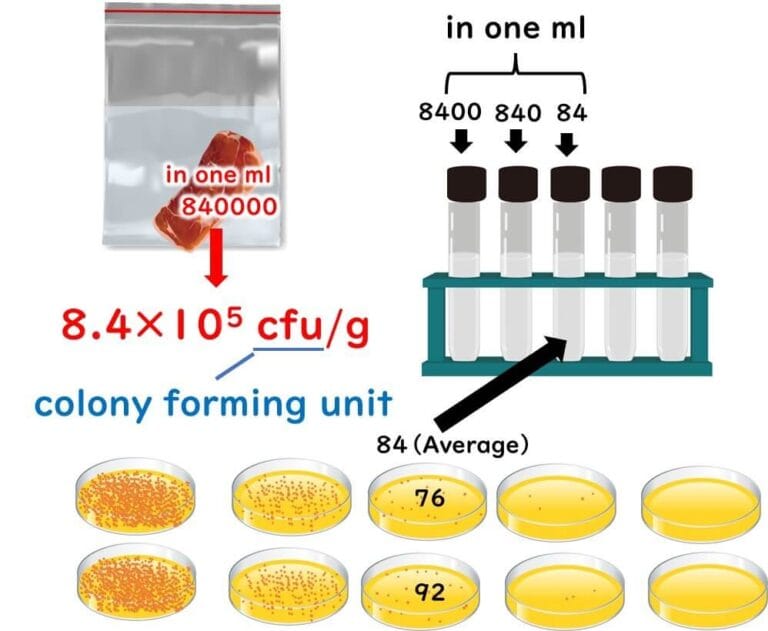
Moreover, when it comes to measuring viable counts, the scale of microbial numbers is more crucial than getting an exact colony count. A minor error in counting is far less catastrophic than a dilution error, which can drastically misrepresent the number of viable microbes.
To fully appreciate the significance of the results, one must have a basic understanding of the microbial numbers typically found in foods and our surroundings. For a deeper dive into what these viable counts mean and their implications, you might want to check out another article we've lined up, making it all crystal clear.
Related posts:
Visualising Microbial Counts: From Fresh Produce to Spoiled Food – A Walk Through the Microbial World Imagine a vast field, stretching for kilometers, with just a...

Discover expert-led lessons in food microbiology designed for professionals and beginners alike.

Author of this Blog: Bon Kimura
Bon Kimura, Professor Emeritus at Tokyo University of Marine Science and Technology (TUMSAT), specializes in food microbiology. He obtained his PhD from Kyoto University and became a professor at TUMSAT in 2006, serving as Dean of the Faculty of Marine Science from 2012-2015. Kimura has published over 200 international papers on food safety, pathogens, and spoilage bacteria. He has received multiple awards, including the Japanese Society for Food Microbiology Award (2019). Kimura also served as an editor for the International Journal of Food Microbiology from 2012 to 2024, where he was the principal reviewer for 1,927 papers.
Copyright © Introduction to Food Microbiology and Safety All Rights Reserved.